Tag Archives: art

Playing around with Papier Theatre!

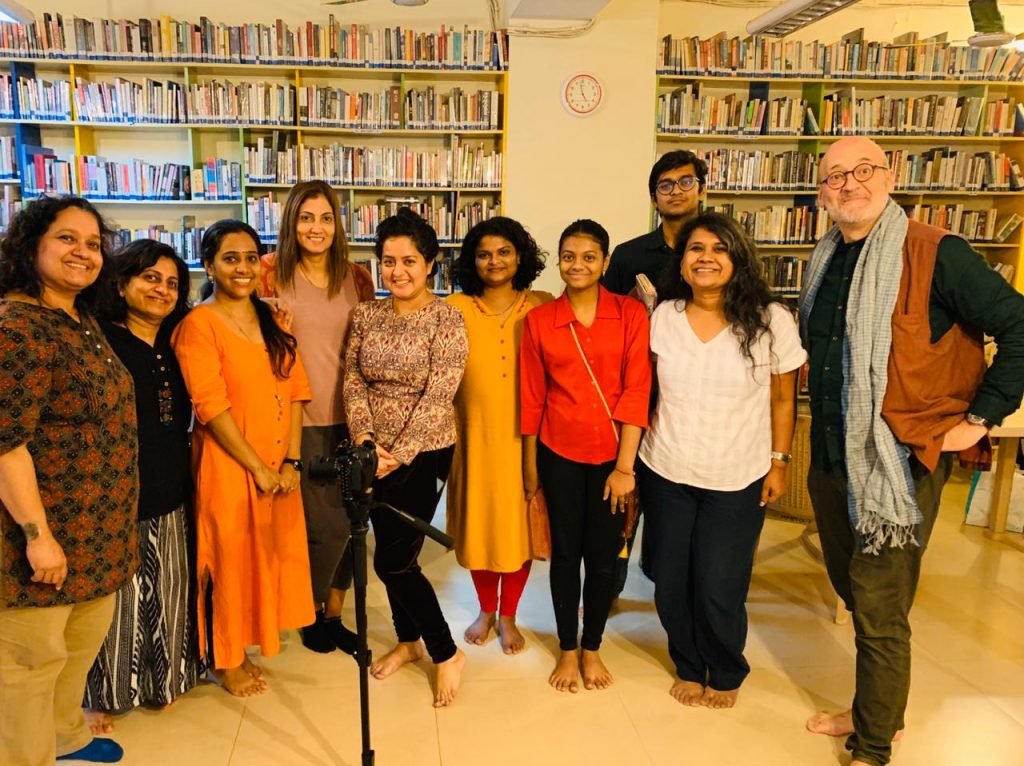
Papier Theatre is a miniature form of theatre. Back in the 19th century, parents used to make small stages and puppets out of paper and put up a show for their kids. Recently, I went to a workshop for Papier Theatre conducted by Frederic Simon, a french puppeteer. I learned how to make the whole stage and backdrop from a cardboard box, I and my group, we painted different backgrounds, made puppets and our props from wires, paper and cardboard. Simultaneously, Frederic sir showed us how we can make puppets from things lying around your house. Things like scrap paper, cloth, your fingers, and he put up mini examples for us which left us in rapture! It seemed as the puppets in his hand had come alive. With all the puppets and the theatre we made, we put up a show in the end. It was named The Golden Bird. The other groups had put up spectacular shows too. It was a wonderful experience! Here are a few pictures from the workshop:

Our theatre, puppets and props.
My fellow puppeteers at the workshop.
Close up.
Facebooktwitterredditpinterestlinkedinmail

Happy Navratri!

Happy Navratri and Durga Puja!

The goddess is here!

I made this zentangle artwork of Maa Durga as an offering to her.

Do you want to know the story of Maa Durga? Well, here it is:

Long long ago, there was a mighty and arrogant demon named Mahishasura. He was half demon, half bull. He wanted to be immortal.  So he started doing penances so that he could ask for a boon. Appeased, Lord Bramha came to him and asked, “what is the boon you seek?”  “Lord give me the power so that no man or God can kill me.” “So be it,” Lord Bramha said in reply and vanished. With his new found power, Mahishasura became more arrogant and started fighting and taking over kingdoms. He soon got to Dev Lok and overpowered the gods and because of Brahma’s boon, no one could kill him. He harassed everyone and wreaked havoc in everyone’s life. The devas went to Lord Bramha, Lord Vishnu and Lord Shiva. They all decided to make and send a goddess to kill Mahishasura. As per his boon, no man or god could kill him. But a goddess certainly could! They all combined their powers and from their power was born Devi Durga. She headed to the abode of Mahishasura. There was a fierce battle between the two. On the tenth day maa Durga slayed him. This day is celebrated as Vijay Dashmi.

Facebooktwitterredditpinterestlinkedinmail

Happy Friendship Day! Friendship day crafts!

Friendship day is coming up soon on 5th August, Sunday; and this time, the crafty side of my mind started running, I make my own friendship bracelets every year, like the last time I made them out of quilling; This time, I wanted to do something more than usual. So, I made some cards, rings made with loom bands, personalized letters, and friendship bands. Here’s how I made all of them:

For the personalized cards, I browsed some images on the internet, using the tag: friends drawing. I scrolled down through the images and took screenshots of the ones I liked and then using those images as a base, and inserting my ideas, I made the drawings in my sketchbook and cut them out and then used my new Faber Castell color pencils that I had bought recently to make my cards. Here they are:


For the friendship bands, I used some foam strips shaped like ice-cream sticks (that’s the best way I could describe them) and stuck a bead on one side, and a loop of thread on the opposite side, so we can wear it. I wrote my friend’s name on top and HFD on the bottom with my name. here they are!

This is how they function:

I also made these rings with loom bands as a bonus:

Here I am sampling all of them:

I made individual personalized letters for all my friends: I wrote all the things I like about them and I added in small messages like, “you are perfectly imperfect!” and; “Roses are red, the sky is blue, sugar is sweet and so are you!”

Here they are:

So these were all my friendship day crafts, you can also make these for your friends and i hope you found these ideas useful. Happy friendship day!

Facebooktwitterredditpinterestlinkedinmail

Making art is a joy.

I 
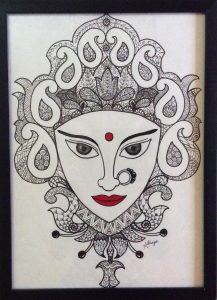
was getting into an artsy mood which is the best kind of mood to be in, as it gets my creative juices flowing, I sat down on the table and just started making something abstract. I took the colours green and purple and a little bit of blue and made lines and free flowing brush strokes going the opposite way and mixing all those colours, turning them into kind of grey. I broke from my artsy mood and asked myself, now look what you have gone and done, the painting is ruined! Now what to do? I shook my head a few times and took a deep breath and told myself it isn’t ruined just think of something creative and it will turn this into a masterpiece. I remind myself time to time of what mako said in her video of mandala; Makoccino is a YouTube channel that has painting and Diy tutorials.
This is what she said: We often stress ourselves over the end result of our painting or any work, not enjoying the process of the painting and ruining it in that process. We should not stress on the end result but the process of making it. It doesn’t have to be a masterpiece it is a work of mind and creativity. And the most important thing is you enjoy what you are doing. (I changed her words when I tell myself but the thought is the same). Anyway, I let my painting dry and then took a marker and started drawing a half mandala. I didn’t made it to be exact and it was a little crooked on one side. But I didn’t care and then went ahead and created some spirals and doodled in them and created this painting. I loved it and told myself: didn’t I tell you? Don’t, I repeat don’t care about anything and let your creative juices flow.
Ps: In case you are wondering, this is exactly what mako said:
‘That we shouldn’t focus too much on the end result, but instead, we should focus on the process. Similar to life, we should just enjoy it and live to the fullest instead of worrying and overthinking every time. Instead of worrying it will mess up or the end result will look ugly, that people won’t like it, why don’t we just focus on the process of creating.’
You should check out her channel on YouTube if you love art like me.

Facebooktwitterredditpinterestlinkedinmail

My New Colorful, Painted Shoes!

IMG-20151228-WA0001IMG-20151228-WA0005

IMG-20151228-WA0000IMG-20151228-WA0002
IMG-20151228-WA0007
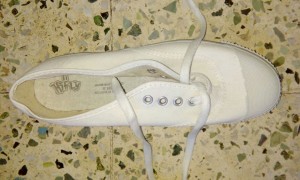
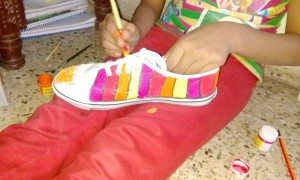
I love to paint a lot! So much, that I can paint everything around me, from vases to boxes to phone covers and walls! So, why can’t I paint my shoes?  And that set me of and I was seen armed with brushes and tubs of paint and then I set to work. I painted them with acrylic colors to make them water proof and used warm shades, but you can use any shade you like, then I outlined them with a permanent marker to give a finished look. Lo and behold! Some boring, plain white shoes turned into colorful ones in just a few hours! You can try this too. Just put on your thinking cap, and get to work!

Facebooktwitterredditpinterestlinkedinmail

Pleasure of giving handmade gifts.

It was my friend’ s birthday yesterday & I gave her a bag painted by me, I also gave her a poem , written by me on friendship.

I painted the bag & decorated it with glitter & wrote “best friends forever” under the painting.

2015-02-28 18.14.08

What ever you do, the thing which is important is you made it.

If somebody would give me a gift made by self, even if it is not so perfect, I would be very happy.

I also made an envelope in which I put the poem.

I think, our feelings are more important than the gift.

Tell me which is more important ? A very luxurious  gift given with no love or a simple gift given with lots of love? Of course you know the answer.

So what are you waiting for? Go & make gifts for your friends with a smile & you will be showered with even more smiles.

Facebooktwitterredditpinterestlinkedinmail

Hanging Lamp

2014-12-29 18.45.15
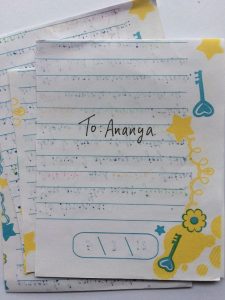
Hello friends, can you guess what is the base material of these light beauties? Yes, it is made up of a paper bag. Come, let’s make them.

First you start off with:

Take a paper bag, and after folding it cut triangles in it so that it looks like the bag on the left.

Cut  the bottom in a zigzag way.

Make designs on the bag.

Outline the diamonds with the colour of your choice.


Facebooktwitterredditpinterestlinkedinmail